Beautiful Boy | Our Titus

2014-04-29_1398795614

Because we are so very proud of him, we want to tell you about our boy:

Titus William is bright and happy and beautiful. He loves Curious George, Thomas the Tank Engine and mac n’ cheese. He enjoys the playground and the ocean and tickles from his Dad and swinging with his Mom and ice cream. Titus is also on the autism spectrum. 

Some of you know, and some of you don’t, and with all of the adventures our family has been on lately, and in recognition of World Autism Awareness Day, we wanted to share a little about our story…

Processed with VSCOcam with f2 preset

Diagnosed at age two, our sweet boy is strong and plucky and complicated. Our story isn’t unique, but it still took us by surprise…

img_2603Once ahead of the developmental curve, we noticed around 20 months of age that Titus’s language development had stalled, repetitive behaviors started to appear, he seemed less social than normal, and a faraway look that was often in his eyes concerned us. After dismissal as simply being over-anxious, and then going with our guts and pursuing months of doctors visits – a couple of which said he was absolutely fine and there was nothing to be concerned about – we received his official diagnosis from the Yale Child Developmental Center in Connecticut, where we had moved barely a year before. Titus had ASD – autism spectrum disorder, with regression.

How do you process the news that your sweet, only, little one has challenges you never anticipated ahead? How do you allow dreams that you once held to reform, change, or disappear? What does your life look like, what does his life look like, what do you do next?…

…for the last two years we’ve been working on this. We’ve grieved and rallied and wept on the floor and raged and rejoiced. We have laid our hearts open to the Father and put one foot in front of the other…

IMG_5176
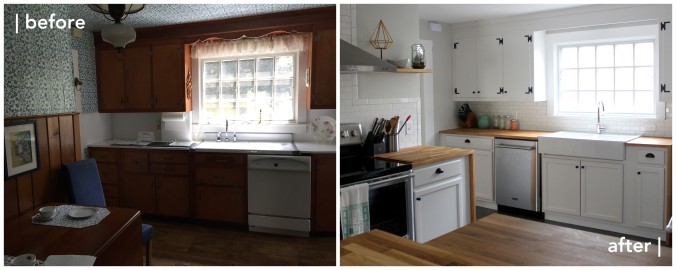
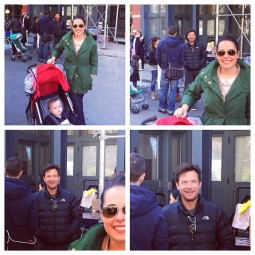
And, we’ve moved across the country, renovated two homes, appeared on a national TV show, flown on airplanes, ridden trains, gone to Disneyland and Disney World and Castine, ME and Palm Springs, CA, and NYC and visited the beach, played with new friends, floated in the pool, swung in the hammock, watched movies and snuggled. And struggled. 

Processed with VSCO with f2 preset

Titus working with Jess, his first therapist

Nothing is the same, and everything is the same. Our Titus is still our Titus. But now, our days begin with a team of Behavioral, Occupational and Speech therapists each morning. And, puzzles and breakfast and sliding on slides. Our minds are occupied with vocabulary and behaviors and planning for an uncertain future. And, popsicles and date nights and buying new shorts because T is always growing.


Processed with VSCO with f2 presetWe are the same and totally different than other parents. And the pain of that ebbs and flows. Looking at old pictures and watching old videos of “before” can be difficult. Because of his regression, Titus had skills at 18months that he is still working to re-master now. Imagining the future brings anxiety. But. Even in the stretching, the fear and the wondering, we have faith.

Titus knows his numbers 1-12, all of his colors, some of his letters and loves to match, sort, do flash-cards, play on his swing set, splash in the waves, and do puzzles galore! He asks us for everything he wants, and points out all of the red lights when we’re driving – he just uses single words instead of sentences. He snuggles and gives hugs and high-fives, and requests popsicles 10 times a day. He makes lots of silly noises – because they feel good to make – and it takes him a long time to fall asleep, and looks at his hands with his fingers spread wide, and gets excited about the wind moving the leaves in the trees. He’s tall for his age, and often gets asked if he’s five or older, even though he’s not quite four yet, which can be hard sometimes, because he can’t always act like a big kid. He loves to run and jump, and it can be hard to sit still sometimes, but he is laid back, an excellent traveler, and isn’t rough with people or things. Every day can bring something new – both good and tough – that we learn how to tackle together. He works harder than we can imagine, every single day, with people and tasks that stretch and strengthen him.

IMG_6551He’s wondrous. And full of sweet, beautiful potential. 

And, he’s challenging. And life doesn’t look like how we thought it would. But, it is still good. And, because we don’t get to see all of you all the time, we wanted to share our beautiful boy with you. And, we wanted to thank you for being kind. For understanding when we can’t gather the energy for another outing or activity, for being flexible, for not being hurt if our little guy doesn’t look at you when you say hello or try to play, and for just smiling when T’s antics are a bit different than other children his age. And, being such sweet friends. And for walking along side us in this journey.  We aren’t done.


Processed with VSCO with f2 presetOur world is still big, and so are our dreams.

Titus’s name means, “Honorable Defender” and he had many amazing words of wisdom spoken over him when we dedicated him to the Lord as an infant. Even though our plans have had to change, we know that his purpose in the Kingdom remains intact and important. Our goal as his parents are to train and guide him to walk out that God-given purpose. Before he was born, we were given the picture of a rhino – a group of rhinos is called a “crash”. They can run at up to 30mph, but can only see 30 feet ahead. We don’t know what’s at 31 feet for Titus or our family, but we will run with faith to crash any obstacle.

Processed with VSCO with f2 preset

We covet your prayers over Titus, and the promise that his life holds. We love him so very much, and know that there is so much light and joy ahead of us. We look forward to sharing more about our #lifeonthespectrum. Feel free to send us a note with questions or encouragement. One of the most meaningly phrases we’ve learned is, “If you’ve met one person with autism, you’ve met one person with autism.”  – Dr. Stephen Shore. Every single trait and ability – both positive and negative – is unique. Know what we are learning every day about ASD, and what works specifically for Titus and our family. We love you, and thank you.

  • Andrew, Rachael & Titus

Processed with VSCO with f2 preset


SaveSave

SaveSave

rahrighouse projects | open concept + dream kitchen

When I look at original photos of our house, I can’t help but wonder a few things: Why all the piiiinkkkk? Wallpaper on the ceiling??? And, what the HECK were we thinking?!?

Built in 1870, and loved by the same family for the 55 years before we moved in, this house took vision. We crossed the threshold with a one year old in-arms, 10 hours away from everything and everyone we knew. It took literal blood, sweat, tears,  and planning and working until all hours of the night, at times. But, we had fallen in love! In love with the history of this house, and this town, and I have to say that adoring my space every day has made it worth it. SO worth it.


So, it’s been long enough coming – here’s what we were working’ with:

The Kitchen

Wallpaper on the ceiling, laminate flooring, dark and small…

The Dining Room

Pink and closed-off and…pink

The Living Room

Pink. Just, pink.

Besides the kitchen, dining room and living room, we also remodeled a laundry room, mudroom, pantry and half bath. It wasn’t a small project – it took nine weeks of washing dishes in the bathtub upstairs and cooking paninis and easy mac in the master bedroom. But, bit by bit, magic happened…

HUGE shout-out to my amazing, hard-working mom, who probably worked harder on our home that we did… We couldn’t have done it without her!

We worked with an amazing contractor, who understood our goals and our budget, and who  – most importantly – creatively tackled the project with an understanding of what it takes to work with the quirks of an antique home. 

They completed the bulk of the work, but we took on painting, and rehabbing the cabinetry (thanks, mom!

We were very fortunate that we didn’t come across anything  unexpected – whew! It was slow, tedious work at times, but I think the results surprised everyone…

**Angels. Literally. Singing.**


The Kitchen & Dining Room

I knew I was picking elements that I liked – my pinterest boards had been out. of. control. for weeks throughout the project, of course – but, I was floored when things actually came together! And, the LIGHT! What a change!

Removing the wall between the kitchen and dining room allowed us to have the open concept that we wanted, and add a “peninsula” with extra cabinetry and bar seating!

The outdated decorative woodwork above the sink was replaced with more modern trim, and the bottom bank of cabinets were replaced. We were able to paint the cabinets above to match the new cabinetry, and reuse the vintage hardware. The pantry/laundry room was enclosed, and washer/dryer were stacked. A new counter-depth refrigerator now stands where the stove used to sit.

Our new stove, hood, open shelving and cabinetry replaced the small breakfast nook, and allows much more counter space for food preparation and storage. The addition of canned lighting replaced the single hanging light in the original kitchen, and did wonders!

Our “waterfall”-style butcher-block countertops came from Ikea – I ADORE THEM. We read lots of reviews before purchasing, and made sure we understood the care and upkeep required (it’s not much!), and after a year of use, I can say they look just a lovely as the day they were installed! I would recommend them to anyone, and you simply cannot beat the price.

Our farmhouse sink and fixtures, as well as our cabinet pulls, are from Ikea as well. At a fraction of the price of other options, again, I cannot say enough how much we love their look AND function!

We chose simple white subway tile with a light grout for our backsplash- stylish and cost-effective! And, we chose a dark grey 12″ x 24″ tile laid in a herringbone pattern for our new floor. It used a bit more tile, and took a bit more time to achieve the look I had fallen in love with, but I think it truly made the room look unique and customized.

Our appliances are Maytag  – the industrial look of the handles sold me! And, though we went back-and-forth a TON, we would’t trade our counter-depth refrigerator for anything! The low profile made such a difference in the design.

I also had fun with the little details. The vintage scale we found in the old pantry when we moved into the house (!), and the chandelier was a fun on-sale find at West Elm. The little hidden bar cabinet is original to the kitchen, and one of The Husband’s favorite parts of the house ;) Painted robin’s egg blue on the inside, it’s certainly a bright spot! Other favs: Bar stools from home goods, the seafoam green pitcher from my great-grandmother, our Nespresso machine, and those Kate Spade arrow salt and pepper shakers :)


The Pantry, Mud Room & Bathroom

This  back stairwell was blocked off at the ceiling long before we bought the house, and the previous homeowners used it as a makeshift pantry. But, with the addition of cabinetry and a GORGEOUS marble countertop (thanks, Amazing Space!), we now have a butler-style pantry that is perfect for entertaining, and a really fun feature!

In the same area, we have a half-bath. Originally, it was very small – a built-in in the dining room and a storage closet made it too tiny even for a standard-sized vanity! But, knocking out, a getting rid of the cray green tile let us open it up to match the flow of the rest of the house. I love the penny tile, and curtain I made from fabric from Ikea.


The Living Room

We were fortunate that the living room was already open to the dining room, and featured five BIG windows. In here, a little paint and curtains went a longgg way.

Ripping up the carpet and painting the stairs made a big difference to the entry as well. And, thanks to Amazing Space, the removal of the wall and addition of the glass railing and loft change the whole character of the house!

A big difference, huh? A little imagination and a lot of hard work made this house into our home, and we are so proud that we were able to add our own chapter to its long history…


Well, we’re glad it’s done, and we have thoroughly enjoyed living in this space, in this house, in this neighborhood, and in this state for the last two years. But, believe it or not, the Rahrigs are actually getting ready to embark on another adventure!

In the next few months, we are trading in our snow shovels for palm trees, and will be moving to Tampa, Florida! Yes, this move is coming a little quicker than anticipated, and I have already cried over leaving my pretty little kitchen more than I would like to admit. But, we feel that this is an amazing opportunity for our family, and we pray that the Connecticut “rahrighouse” will bless and bring joy to another little family just as it did to us!

We would LOVE your prayers as we embark on the search for another rahrighouse… Florida sunshine edition!


Style Notes & Sources:

Paint colors

  • Living room, Kitchen and Dining Room: Sherwin Williams, Repose Gray
  • Mudroom: SW, Dorian Gray
  • Bathroom: SW, Eider White
  • Inside of bar cabinet, laundry room, pantry: SW, Sea Salt
  • Cabinetry: SW, Eider White
  • Stairs: SW, Gauntlet Gray
  • Trim: SW, Extra White

Kitchen/Dining Room

Bathroom

  • Vanity: Home Depot
  • Mirror: Ikea
  • Towel bar and flower pot: Ikea
  • Lighting: Ikea
  • Tile: Lowes

Mudroom

  • Lighting: Ikea
  • Cabinetry: Lowes, unfinished

Living Room

See my other rahrighouse posts here!

Questions? Let me know! I am happy to answer them!

goodbye, sweet little kitchen!


rahrighouse projects | sun porch “glow-up”

image1

our snowy wonderland a few weeks ago

Ahhhh – sunshine. This time of year I LONG for it. Winter has hit that it-feels-like-it-will-never-end point, the snow has been on the ground for weeks, and we are ready to thaw!

Fortunately, there is one particular spot in the house that provides a little respite from the cold, and, it’s one of the Husband’s favorite spots in the house – our little sun porch!


img_0297

last winter, looking out on the frosty yard


The moment we walked through the house, we knew this room had promise – what a unique space! But, we were still so pleasantly surprised at how lovely it turned out. With interchangeable screen and glass panels, it’s cozy on sunny winter days, and breezy on summer nights.


img_1904

family reading time

The previous owners had a “thing” for pastels, and made the floor into a unique and slightly unconventional canvas… In short, it was very nice for them, I am sure. However, we weren’t feeling’ it. Yes, it looks like a pleasant spot for a nice iced tea, but it was a little colorful, a little kitschy, a little cluttered…


But, not for long!

img_2603

great for painting!

With some leftover paint, a trip or two to Ikea (of course!) and some digging through the decor we already happened to have on hand – or even found in the old garage at the house – things came together quickly… especially after that floor was toned down a notch or two!


Processed with VSCO with f2 preset

Now, this cozy spot provides an entertainment space, book reading haven, and an extra toddler play area (that requires no shoes, and less hosing down afterwards than an hour digging in the garden ;) And, you could still comfortably sip some tea, or a nice malbec, with your friends!

Processed with VSCO with f2 preset

Another view: This door opens from our kitchen, and the porch leads to our back yard and gardens. I love to leave it open  – so breezy!

rahrighouse-before-after5

Details: 

  • Wall decor: Crate & Barrel candle holder, painted.Processed with VSCO with f2 preset Vintage tennis racket, found in the neighbors trash, buoys, purchased at a marine salvage in Mystic, CT
  • Trim paint: Sherwin Williams “Sea Salt”, the perfect subtle blue/green
  • Curtains and hardware: LENDA, Ikea
  • Furniture: Estate sale, repainted black. Cushions, Ikea. Antique hutch holds items found at the house.
  • Rug: Ikea, the same style as the one in our master bedroom

image2There is barely a corner of the house that we haven’t changed or fussed with or painted or spruced, and I have a few more projects to show you before you’ve got the whole picture ;) It’s been fun, and challenging and rewarding – and we’ve learned a LOT along the way! Always feel free to ask any questions you might have (and stop visit if you’re ever out this way!)

Cheers to spring around the corner!

rahrighouse projects | behind the scenes

Hey, all! It’s been a few months, but now that the literal dust has settled on our Amazing Space project, the show has aired, (AND, the series was officially picked up!) I wanted to share a little more about our home renovation!

Wow – what a whirlwind!

We have to say that even though Connecticut is far away from lots of our friends and family, we have felt SO loved through this process! It was an amazing experience to have the opportunity to have our home renovated, and get those 15 (okay, maybe 22 minutes….) of fame, but it has also been a blast to talk about the project with our friends and neighbors, new and old, near and far.

| T enjoying the filming equipment! |

(The local media in Milford picked up “our story”, and it was shared more than 100 times, with more than 200 “likes”, and this little blog almost doubled it previous readership record!)

So, particularly because it is snowy and cold outside, I am excited to share a few warmer-weather throwback “behind the scenes” pictures, and to show you more of our renovations in future posts!


Focused on our second floor (and now THIRD floor loft!) Amazing Space truly transformed our home. A rather dark sitting room – painted spring green when we moved in, and with no distinct function – now is a bright, airy focal point of our home!

rahrighouse-before-after2

Left: The sitting room when we moved-in Center: Sitting room before renovation Right: Sitting room after HGTV magic!

And, a largely unused walk-up attic, magically has become the cheeriest spot in the house! An office space, desk for our little one, a hidden bed/reading nook AND the most lovely fairy-tale-esque spiral staircase you can imagine.

rahrighouse-before-after1

BUT: The BEST thing about Amazing Space, besides the actual space that was amazing, of course, were the folks we got to work with…

|The Husband, Producer Mark Philips, Host Eric Griffin and I on “Reveal Day” |

They made the process – though the dust and mess and some stress is inherent – streamlined and enjoyable! Even with the time crunch of filming, and the pressure of making a great first show, they were considerate of our family, our home, and our tastes.

| a new little chair for T!|Donna, of Donna Benedetto Designs was our amazing
designer – the decor she chose for our new space flowed seamlessly (with a little added flair!) with the rest of our home. A detail I LOVE that they didn’t show was the little chair that Donna hand painted for T! It was in the house when we moved – another treasure from a different era.


Processed with VSCO with g3 preset IMG_2640Denis, of Guiltec Development,  was our contractor, and his attention to detail still astounds me. His company has specialized in historic and reclaimed spaces, and he was in his element! Throughout the entire project, his team was efficient, and went above and beyond in a million ways.

blog-8

| Vintage rail finishes, meticulously matched by our construction team |

Some of my favorite details: The wainscoting in the loft, the rail finishes that were matched to the original in the second story (apparently a funky, old method that

img_4171

|Storage view |

they’re going to try in future projects, as well!), and the sliding door made of the original flooring from the attic! Also, the Irish accent. Of course.

Collages5

| Our sliding barn door and bed “nook” made from the antique flooring of the original attic |

Steven, of Keedle and Lee Architects, who also had an amazing  – British, this time – accent, by the way, was also fantastic! He and his team had wonderful ideas, and made us feel so secure that all decisions that were made were the right ones for our family, and our home. And, his illustrations and animations of the house were so fun, too! He answered a million questions, and worked tirelessly to find creative solutions to our home’s unique space needs.

IMG_2665

Processed with VSCO with f2 preset

|Hudie and Ricky watch filming taking place in the yard from our kitchen|

And, of course, the show’s host, Eric Griffin, who not only knocked on our door and handed us this amazing opportunity, but who also pioneered the idea of the loft and spiral staircase! Producer, Mark and Hudie of MPPT and his team, who came from L.A. to take a chance on our home, and with their impressive resume of television successes and endless creativity, made Amazing Space a hit! And, Rick of NYLAC, who made most of the magic happen behind the camera (and drone!) and whose chill attitude made even stressful filming a breeze. And finally, head production assistant, Eric Mathis, who handled every scheduling detail, on-camera cue and the no-so-easy task of walking two newbies through what it takes to make a successful tv show. These guys, and every other person that walked through the door were truly great people. Even during the early mornings, or when it was 90 degrees outside, or when the ceiling fell down faster than anticipated… We couldn’t have asked for a better group to have in our home!

We are so happy that we were able to be a part of the birth of a new series, and look forward to watching coming episodes! Our home has truly felt complete since this project was finished, and our space makes me smile every time I walk into the room – no joke!


In the coming weeks, I hope to show a few more details of our other home renovations, including our big kitchen project, and even more before-and-afters… ’cause everyone loves a good before-and-after ;)

rahrighouse-before-after


rahrighouse projects | lights, camera, action!

Processed with VSCO with f2 presetI’ve been quiet for a while, I know. But, I’ve had a realllllly good reason. A totally unexpected, never could have predicted, one-in-a-million reason:

Basically, we’ve lived THE dream. You know – the dream you have when you’re the type of person who binge-watches Property Brothers, have designed your “tiny house” in your head, and whisper “shiplap” as you drift off to sleep most nights…

That’s right, folks. The Rahrigs, and our sweet little Connecticut home, are going to be ON TV!


It alllll started when we received a knock on our door on a rainy day in February. The Husband was out of the house, I was upstairs with the little guy who was grouchily waking up from a nap, and the last thing I wanted to do was run down to see who was there (like, we had two friends so far in CT… maybe it was the mail lady?). I finished getting T settled, looked through the window on the off-chance someone was still there, and noticed a truck in the driveway. I cautiously walked down the stairs, and saw a man in a baseball cap jogging up to our doorway. With a big grin, and a ton of energy, this stranger started excitedly talking…

“My name is Eric, I’m with HGTV and we think YOUR HOUSE IS PERFECT...”


IMG_2485

|I mean, it IS pretty cute…|


askdjfhalskdjfh. What? I thought, as I stood there with no makeup, in my socks, with the door cracked.  Was I hard-of-hearing?… He started again:

“We are doing this great new show, I’m the host, and we’re looking for a historic New England home, and a young family! Your realtor sent me over! The concept is that we are maximizing and getting creative with space that might be usually ignored…”

askldjfhajskdfh. Huuuuuuh? I was visibly scoffing at this point. Like, this sounded too good to be true, right? Or, I just finished a nine-week renovation and barely escaped with my sanity, so NO I do NOT want any more construction within 100 MILES OF MYSELF ever, ever, ever agin, right?

But, he seemed genuine enough. So, I let him finish talking. And I kindly took his name and number, thanked him, closed the door, and called the husband to tell him this hilarious story… Little did I know where this random happening would take us!

Processed with VSCO with f2 preset


Fast-forward a few months, and our home is now more lovely than I could have imagined. And, the husband has fulfilled his lifelong dream to be a tv star. And maybe Titus has a future on Law & Order. And, we had the adventure of a lifetime.

SO, tune in to the *DIY Network on Wednesday, August 3 at 8:00p.m. to watch Amazing Space and see the new and improved RahrigHouse in all of its glory! UPDATE: Watch on the HGTV Network on Saturday, August 27 at Noon!

Also, a VERY special shout-out to my mom, sister Bekah and sister-in-law Jessica for lots of couch sleeping, box and furniture moving and babysitting during the process!

You can see more of our home renovation adventures here, and expect updates here at FreshlyMinted soon!

AMAZING SPACE LOGO

*DIY is the HGTV sister network. The show will likely air on HGTV at a later date – we’ll keep you posted!


rahrighouse projects | master bedroom makeover

Master doorwayOften, as we’ve finished bits and pieces of this home, I look back on the pictures we took the very first time we set foot inside…

…and I wonder what the heck we were thinking.

But, though it took an abnormally large dash of vision and plenty of elbow grease, we’re pretty much loving how everything turned out. Recently, we (finally!) got several of our pictures and bits of artwork hung on our walls, and things are feeling very homey. One of my favorite spaces in the house is now our peaceful master bedroom! What it lacks in size, I hope it makes up for in charm ;)

Master entry

Now: It’s a bright, eclectic, secret garden-grandma’s attic-farmhouse-chic space (yes, I just made that a thing) that makes me just want to ZZzzzz…. But, that was not always the case. Enter, the before:

Master before

As with most rooms in the house, this one was painted pink. And the carpet was pink. And the light fixture was pink. And though though you couldn’t keep those airy windows down, the space needed a bit of sprucing up…

…juuuust a bit.

So, carpet was pulled up, a million tacks were yanked out, walls were painted Sherwin Williams Gauntlet Gray, and after we found this inexpensive solution to the roughly-worn hardwood flooring, and added a few personalized touches, a real, live master bedroom was born!

Masterbefore-after

Shelving was found at (one of my favorite places on earth) Homegoods… or three different, Homegoods, actually. I was determined. And even then, I still had to paint the metalwork so they all matched. But, it was worth it, right?!

Master touches

Our bedding, curtains and curtain rods, like our rug, are from Ikea (you’ll see this blessed, inexpensive, trendy, retailer pop up a LOT in future posts!).

IMG_9322Our dresser was salvaged from a curbside when I was in college, and my mama refinished it. I just added a touch of earthy-gold & glass with knobs from Hobby Lobby – these pay homage to our front door’s antique doorknob – a detail I immediately fell in love with.  

Our bed, my round mirror, favorite perfume, a “treasure box” and jewelry tray (featuring one of the first x-rays ever produced – demonstrated to the public at the turn of the century, this image is of a woman’s foot in a victorian high-laced boot… so quirky. I adore it) are all items we’ve had and loved for years.

|Quick Curtain tip – hang higher and wider than you think you should, and usually it’s just right – it maximizes the light and size of your window, and ads drama! Check out the difference in the photo below, and the snowy New England view at the end of the post! |

Masterbeforeandafter

A few photos from our wedding and our whirlwind trip to europe, along with a couple of antique books from my personal collection, round out the space…

Master view

Finally, I must note that while it has long been the stuff of my daydreams, one distinct drawback of living in an historic home is that the (most likely, as based on my extensive Little House on the Prairie/American Girl research ) three dresses and two pairs of shoes that the original owner possessed fit much more neatly into these tiny closets than my wardrobe…

Master closet

But, with a some creativity, along with kicking your husband’s clothes out into the office closet and taking over one of your son’s two random closets, it all works out. And that giant mirror is awesome for selfies. 

NeighborsSo, small changes can go a long way. Unlike our kitchen space, walls didn’t come down and there were ZERO professionals involved (like, we’ll see how long those shelves stay in place, but we tried our best), but the before/after speaks volumes! So, get out there and tackle a project of your own – tell me how it goes!


rahrighouse projects | diy chalk paint furniture refresh

Processed with VSCOcam with t1 preset

|a cozy, box-free living room… bliss|

Happy New Year!

We, I am happy to report that we are now construction-free! |read more about our new home adventures here| A few more touches are needed here and there (in this round of projects, of course), but we are LOVING having a WHOLE house to live in, and a beautiful one, at that! Though… we are partial :)

While I am continuing to get things squared away just-so,  I wanted to share another fun piece of our renovation |I previously shared our diy staircase refresh| – our practically free dining room set and accent chairs!


DIY Chalk Paint Furniture Refresh

Estate SaleSo, some of you know, my husband has a nose for deals. Particularly those that are really, really cheap. And, usually, not exactly the kind of stuff you want hanging around your home… (sweaty used equipment for sports we don’t play, anyone?). But, lately, he’s struck MAJOR gold. First, with this incredible lot of furniture just before the move from an estate sale  – All for $59.00. I REPEAT, $59.00.

Best day of his life, so far, I’m pretty sure.

And then, with a table and six chairs that one of the neighbors along our new street were taking to the curb! FREE. His favorite word. Now, this stuff needed love. And paint. And fabric. But, we made it happen (again, with more than little help from my mama). And, I LOVE how they turned out:

CT adventures - Nov-Dec6

|This is the picture the Husband sent me from the basement of the estate sale – looks promising, right? But, the results proved he was right!

CT adventures - Nov-Dec5

|And, here is the picture he texted me of his free treasure… that fabric! Yuck! But again, it turns out this was a great find, and I can’t say anything the next time he brings home two used tennis rackets or sweaty goalie gloves for middle schoolers…. you know, for someday.

CT adventures - Nov-DecI knew I didn’t want to invest a ton of time into these projects, and certainly not a lot of money. So, I started looking into chalk paint. A total craze that has taken the diy world by storm the last few years, I walked into a local shop and asked a few questions and looked at samples. After 5 mins, I was sure it was right for my projects: Lots of colors to choose from. No prep. Two coats of paint. Two coats of wax. Done.

The products stretch very far, and with two cans of Annie Sloan chalk paint in French Linen, two cans of Clear Wax, and a wax brush in-hand, I left the shop with all I needed to transform eight chairs and a table for just over $100 (and I have enough for another small project left over!)

CT adventures - Nov-Dec1

We quickly wiped down the pieces, and dove right in! The first coat didn’t seem to cover amazingly well, but the second coat was like magic! The ultra-matte paint looked beautiful, and was so easy to use. It dries in 15 min, and covers a multitude of sins. After drying, we used the clear wax – there is also a dark wax available to give a more antiqued look – and brushed it on with the round wax brush. A quick coat, applied in small sections, and wiped off immediately, is all it takes to give the piece a clean, durable finish. After drying for 24hrs, we repeated. And then, let it cure (while the construction in the kitchen was completed ;) 

Note: We did the MOST BASIC level of chalk painting, but the techniques are endless! Layering, gilding, distressing, you name it! Also, we did learn that is it possible to put on too much wax, especially on large surfaces like the table top. But, using more wax to “activate” the old, you can wipe off excess so you don’t get finger prints or shiny areas. 

CT adventures - Nov-Dec3


Between coats, we reupholstered the seats for the chairs. We chose two fabrics – a grey and white spotted for the dining room (which we reversed, because we liked the back side better!), and a white linen with silver metallic accents for the living room chairs.(This added about $100 to our project costs, bringing our total to $200 from start to finish – we used coupons at JoAnne’s and Hobby Lobby!).

The foam on the dining room chairs was in decent shape, so after removing the old fabric, we only needed to measure, cut and staple the new fabric over the seats (there are some great tutorials with hints and tips on youtube!). The accent chairs needed a little foam added to the underside to give some extra support, so with some tucking and stuffing, they ended up much more firm. After that, it was just the same procedure as the dining room – staple, pull tight, and carefully tuck those corners.

And so, with a little elbow grease, and no major tools or special talent needed, we went from yuck, to this!:

CT adventures - Nov-Dec4

|Serene and monochromatic is what we were going for…

CT adventures - Nov-Dec7…makes me relax just to look at it|

This was a fun, easy and rewarding project – I highly recommend trying it on a “junktique” piece of your own! Also, in case you were wondering, here is what our dining room looked like “before”…

Dining room

…”peachy”, right? We’re just getting started.

Throwback | diy holidays

Christmas sled

We found this vintage sled in the garage when we moved in – I knew it would be a perfect to add a little holiday spirit to our porch!

This holiday season has varied a little from our norm…

Usually, we’d be knee-deep in greenery and cookie baking by this time in December. But, this year, we have no place to put a Christmas tree yet because apparently it’s not super simple to renovate a 145-year-old kitchen, or something. And, obviously, cooking is hard when your new oven is still shrink-wrapped in the garage. So, my living room still looks like the pic below, but, with some help from my awesome mom who has been visiting (who, side-note, will paint your kitchen cabinets until 6am for you, and do your laundry…) at least the outside of the house is looking festive!

Processed with VSCOcam with f2 preset

The filter makes this pic look way more serene than it feels irl… But, the end of our sea of boxes is near!

Things are different, BUT, I’ve found comfort in some old and new traditions – some of which I’ve shared on FreshlyMinted in the past! And, a white-and-grey-and-butcher block-and-harringbone – and subway tile- rustic farmhouse kitchen is now totally within sight… so I can be patient a little longer ;)

In the meantime, here are a few of my favorite throwback holiday posts and projects:

Processed with VSCOcam with f2 preset

Handmade Holiday | Rustic Boxwood Garland & Mini Wreaths, Newsprint Tree, Perfect Christmas Bow and Popcorn garland (I used holly for my garland this year – much more prickly, but just as lovely!)

Salt Dough | Gift Tags & Ornaments 

Secret Holiday Treats | Aunt J’s Top Secret Chocolate Mint Cookie Recipe

A Cookie-Swappers Daydream | Salted Mudslide Cookie Recipe

Enjoy!

“rahrighouse” projects|diy staircase refresh

Things around here are taking shape. Like this one single corner of our bedroom:

Master view
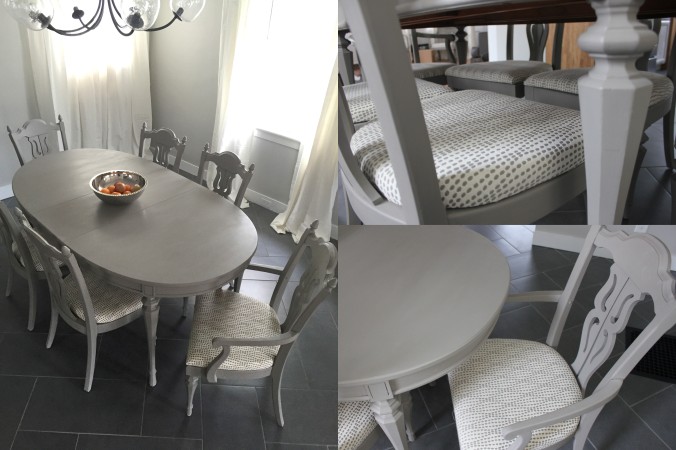
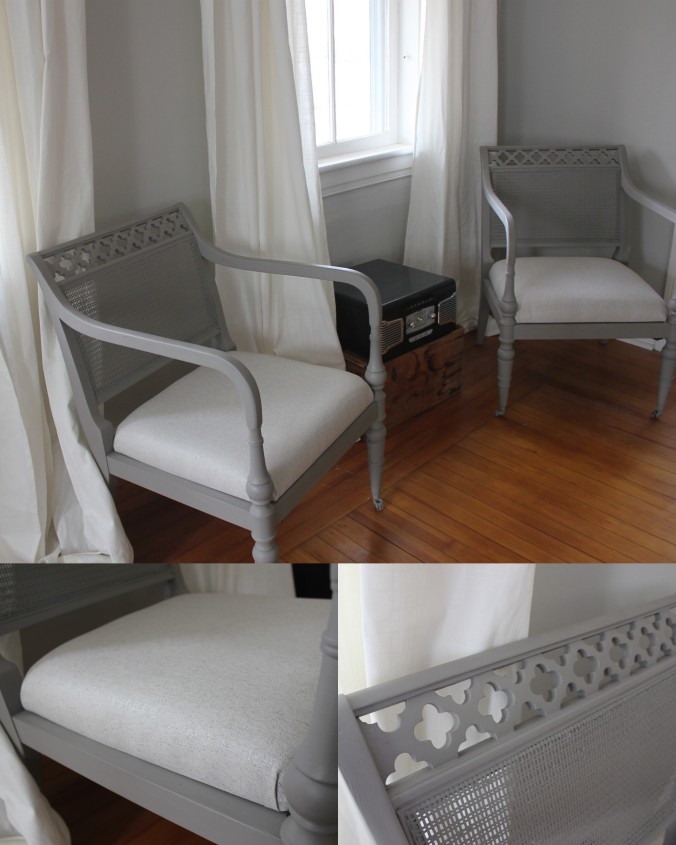
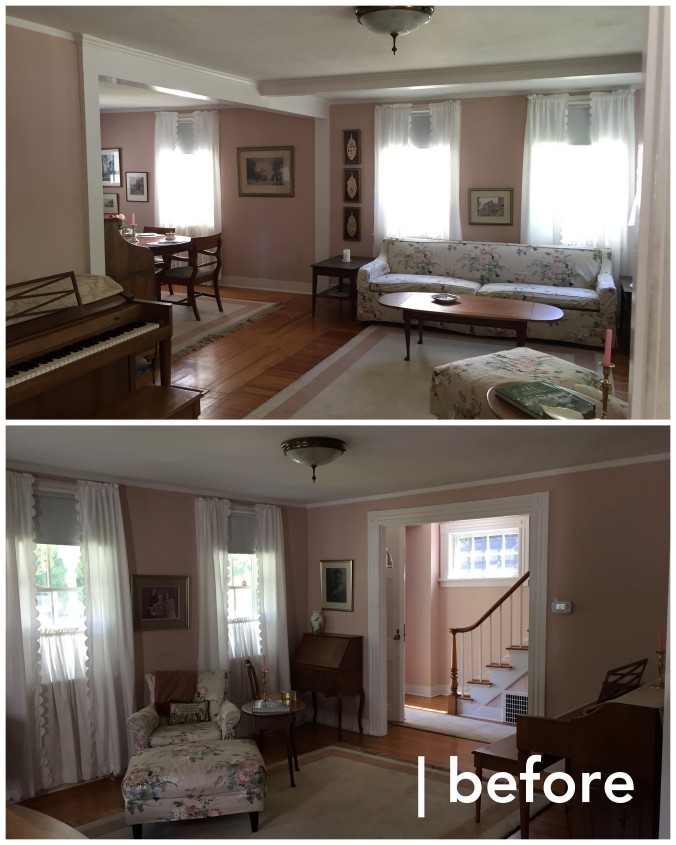
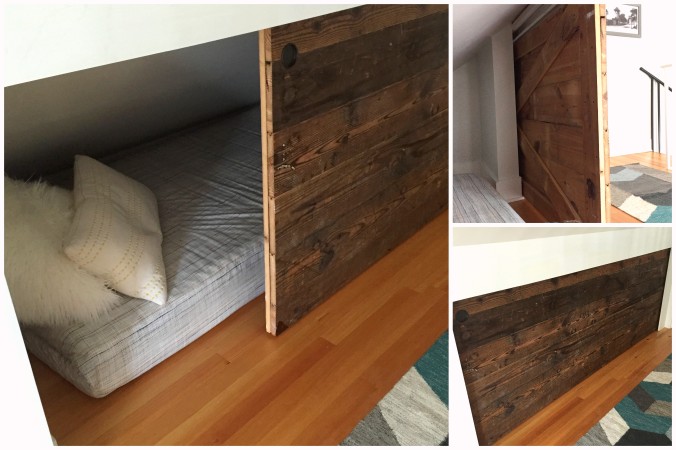
Slowly, but surely. Sometimes more slowly than surely. But we’re getting there!

As I mentioned in a previous post, we are in the midst of renovating a little 145-year-old house in coastal Connecticut. Much of the work we are having completed by (a really awesome, patient) contractor, but there are a few projects that, with the help of my amazing mom, the Husband and I are tackling ourselves. One of those with the biggest impact has been our staircase update!

Stairway before and after

When we moved in, the entire house had hardwood flooring, except a the carpeted  master bedroom, a small landing, and the staircase. It was horrid. So, project #1 was to pull it up. The stairs weren’t horrible, but they weren’t in great shape, either. We knew we didn’t want to completely overhaul them, but they needed something… so, painting it was!

After browsing for ideas, and chatting with our local Sherwin Williams, we chose our paint, grabbed wood filler and a sander, and started:

,m;wgr ef gkpojias]HTBEF ]

1| You can see the original state of the stairway. The wood was finished on the edges only, and wasn’t of high quality. And, that carpet…. woof.

2| After pulling up the carpet and nails, we washed the steps down with a vinegar solution. There were a lot of holes from this, and previous rounds of carpet, and the trim didn’t match along the bottom lip of the steps. We contemplated replacing the trim, but ultimately decided that after filling the gaps, we wouldn’t need to completely replace it.  This saved a lot of work, and we avoided having to find tools we didn’t have on hand. Like, anything but a hammer, screwdriver, and sander, tbh…

3| We sanded with a handheld sander, fine grit. Then, we went ahead and went crazy with the wood filler. Then, we sanded again. Finally, we wiped everything down with a slightly damp cloth to get rid of dust, and prep for paint.

4| We chose SW trim paint in Extra White, and SW Porch and Floor Enamel in Gauntlet Gray for the tops of the stairs – the same color we painted our master bedroom, and part of a very neutral gray palette used house-wide. After sanding and cleaning, we painted the white trim, and every-other step. We only have one staircase, and needed to be able to make it up and down throughout the day while each coat dried! We used a 2″ flat brush, and a 1.5″ angle brush, and a bit of painter’s tape came in handy…

5| We painted each step with two coats of paint, and let it dry thoroughly in-between. I am in LOVE with the finished product. What a difference! After more than a month of heavy use and lots of drywall dust and dirt, they’re holding up wonderfully :)

The stairs were one of the big reasons I fell in love with this house in the first place. You might have noticed a little something embedded in the rail:

stairs penny

It’s an “Indian Head” penny, dated 1899! When I saw it, my history-loving, American-girl-obsessed, authentic-costume-wearing-period-interpreter-in-high-school-self almost exploded. It’s just SO COOL! And now, it graces stairs fitting its historic cool-factor. And that makes me happy.

IMG_8863There are roughly 1,543 other projects in various stages of completion throughout the house, so there will be more updates to come. But, I cannot wait for the big kitchen/dining room/laundry room/bathroom reveal – fingers crossed it’ll be coming soon!


Big City Living | NYC tips & favorite things

Processed with VSCOcam with t1 presetSo, I used to post a lot of recipes. Currently, however, our master bedroom is serving as our kitchen  while most of our first floor is under construction. Though it is complete with mini fridge, microwave, toaster, panini press and espresso maker, even with all of these fabulous amenities, my cooking repertoire is limited, to say the least. So, the recipes will be coming…. but I’m gonna give it a few more weeks… (unless you want to know how to grill a sandwich without catching your bedroom curtains on fire. I’m pretty good at that. ).

In the meantime, as I eat cheese, crackers and apples for lunch again (totally under-rated, by the way. Like an adult lunchable, and who didn’t love those?!), I thought I’d share a few of our favorite things about our brief Big City life!


2015-02-08_1423417429
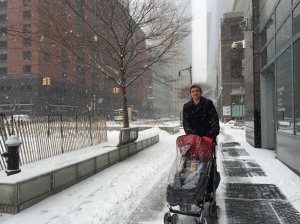
We moved to Jersey City, NJ in freezing early February for a short-term assignment for the Husband’s job. In a small apartment in a tall building along Hudson river, there were a lot of adjustments to make.   Of course, having all of NYC literally at our feet for three months was pretty spectacular. But, there was a bit of a learning curve involved…


At first, I was frustrated. The sparkle of those famous lights was so near, but it was roughly -24 degrees, and I had a 9mo old and the trains were crazy, the Husband worked and had a long commute during the week, and I was sure I would only get to admire the sights from afar. Humph. But, after careful observation of the city-savvy parents that surrounded us (and watching every episode of Friends), we realized that the cold + baby + subway was not an impossibility. And, though the weeks were long, we filled every weekend to the brim. A challenge, yes, but a zillion people traversed the snow and crowds every day, little ones in tow, and we found that we could, too!

BedroomView2

Some of Our (more obscure) Favorite Spots

We visited Yankee Stadium, Madison Square Gardens, Grand Central Station, the Statue of Liberty and Ellis Island, made lots of trips in and around Times Square, the Freedom Tower and 9/11 Memorial, MoMA, Museum of Natural History, The New York Public Library, Bloomingdales, Macy’s  and dozens of other shops  and attractions that you already
know are gorgeous. But, here are a few less common stops that should be on your list!


IMG_0389
Hoboken | On the Jersey side, this spot is hopping! Yes, you can visit Carlo’s Bakery, but there are a ton of fun restaurants in this up-and-coming community on the banks of the Husdon. We loved this stroller-friendly biergarten! Tip: Jersey is a super quick ferry or train ride away from the city, and it can be far less expensive to stay on this side of the river if you’re planning a visit. You also get one-of-a-kind views of the city, and easy access to the Statue of Liberty and Ellis Island! Quick Facts: Also Frank Sinatra’s birthplace, and the filming location for the classic movie, “On the Waterfront” starring Marlon Brando.

Jason BatemanTriBeCa | Short for the “Triangle below Canal street” we visited this area for the first time during the Tribeca Film Festival, and I fell in love! Perfect for celebrity sightings (like Jason Bateman –>) and ahhhhmazing brunch, strolling these streets make you just FEEL like you belong here and could totally make this city home, and have a “squad”, and walk to the gym in heels and stuff like that. Or, you could just go to Starbucks and people watch.

Processed with VSCOcam with t1 presetUnder the PlazaThe Plaza itself is the kind of place that childhood dreams are made of… perched at the edge of central park, it’s everything that our Eloise books and Home Alone 2 told us it was. The Husband and I enjoyed drinks at the Palm Court on a date night, but the real hidden gem of the place is what’s under it! Perfect with kids, get a casual plaza experience with the dining options, and even pack a picnic to take to the park (like we did for T’s first birthday  – complete with cupcakes!).

2015-04-13_1428889454Momofoku Milk Bar | I had a LONG list of places we HAD to visit when in the city, and Milk Bar was near the top. And it deserved it. The cereal milk ice cream with cornflake topping is as good as they say, and the cookies and bars are even better. You just HAVE to go!Uniqlo | This shop is spreading like crazy, and is well-established on the East Coast and here in CT where we live now. But, for us midwesterners, it was awesome! Like a funky-industrial mix of the good parts of Gap, JCrew and H&M, their clothes are fun, functional, and perfectly priced. They have things for littles, too!

IMG_1186The Gansevoort Market | It’s a good idea to cruise instragram for fun locations to visit when you’re in a new spot. That’s how I discovered this gem! Etheral, historic and packed with good things to eat, this was a fun destination for casual lunch in a beautiful atmosphere!


2015-05-02_1430577185
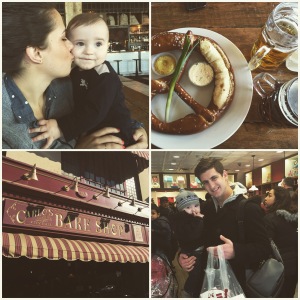
Bemelmans Bar | If you want to feel like you walked onto the set of Mad Men, this spot is a date night MUST. Nestled on the Upper East Side, and named for the artist that created it’s fabulous murals (the illustrator of the beloved Madeline books!), it’s just to die for. Tip: The King Cole Bar is another NYC classic with vintage vibes, and a secret hidden in its mural.


Honorable mentionsCheeky Sandwiches – Chicken and biscuits and ginger ale, thanks to the New York Gebert kids for introducing us :) | Eileen’s Special Cheesecake – The Husband doesn’t like cheesecake, so I bought him one and ate both. duh. | The Boathouse restaurant – A very popular spot in Central Park, but they have a less-busy causal outdoor area perfect for sitting with a glass of wine and a toddler!

IMG_0777

Tips & Tricks for Parents

Especially if you visit during the colder months, here are a few ideas for parents planning to visit NYC or any big city with a little one!

IMG_0396Rain cover + Bundle Me | Your stroller rain cover isn’t just for rain, and you have to buy one of these. No blankets falling off every five seconds, no howling wind, and all of the sudden our brunch date with friends when it was 12 degrees was on the table again… Titus and hundreds of other kids we saw each day were cozy for all-day city outings for months with this combo! This has been great for our new adventure here in CT, too. No need to stop enjoying long walks because of the weather!

IMG_0220Stairs + Strollers DO Mix | You’ve just gotta be ok with hauling your stroller up and down stairs for the subway. We were pretty appalled at the lack of accessible subway stations, and figured out quickly that to be efficient, you’ve just got to use the stairs. Though, you could call a cab and hold your child on your lap, and stow your stroller, it’s a lot of effort! We didn’t use a cab once when out with the baby, and never had any real issues. Baby wearing also helps, particularly if you’re trying to train solo!

IMG_1262Pack Small | I didn’t understand the concept of an “urban jungle” until we had this
experience. Dressing for the weather and the tired feet, plus packing the snacks and toys and diapers necessary for 6 hour day in the elements makes you look more prepared for an arctic expedition than a chic day in the city. BUT, everything in the city is tight – small restaurants, small sidewalks, crowded subway cars. We brought our big jogger stroller with us and didn’t touch it! We also opted for a backpack style
diaper bag, and a back carrier for museums. Anything that can be efficient and compact is a game changer (another reason the bundle me was so great)! It can be hard to do with littles, but economize any way you can.

Processed with VSCOcam with f2 presetBabies are babies, even in NYC | It’s ok to feed, change and tend to your baby virtually anywhere. We nursed and changed in museums, at sporting events, in restaurants, on busy streets and subway stations. There are WAY weirder things going on in the city. Trust me. Just go and see what you wanted, go and eat great food, and bring the baby along to (almost) everywhere with you.

At the end of our time in the city, we were ready for some of the more familiar comforts of home – a yard for the baby, peace and quiet, no crowds… but, we’ll always treasure our New York adventures! And fortunately, our new home is just about an hour away! So, if you’re making a trip to NYC, give us a call. We’d love to have a reason to visit some of these amazing spots again, or try something new :)